
Learning how to sharpen a chainsaw mill chain properly will save you more cutting time than any other maintenance habit. A dull chain is the most common reason a chainsaw mill starts cutting slowly, wandering off line, or burning the wood instead of slicing through it. Milling puts a chain through more linear feet of cutting per session than almost any other chainsaw work, and it does it while dragging through more embedded grit, sap, and mineral streaks than a felling or bucking cut ever sees. If you already own a ripping chain, or you are trying to decide between a round file and a bar-mounted grinder, start here. This guide covers the angles, the tools, and the maintenance routine that keeps a mill cutting straight instead of curving into the cant (a log squared off on two or more sides).
This is a companion to our guide on the best ripping chain for a chainsaw mill and our chainsaw mill setup and first-cut guide. Read either of those first if you haven't already, since sharpening only matters once you have the right chain on the saw and the mill set up correctly. Everything below assumes you already have a ripping or standard chain mounted and are trying to keep it sharp, not choose one from scratch.
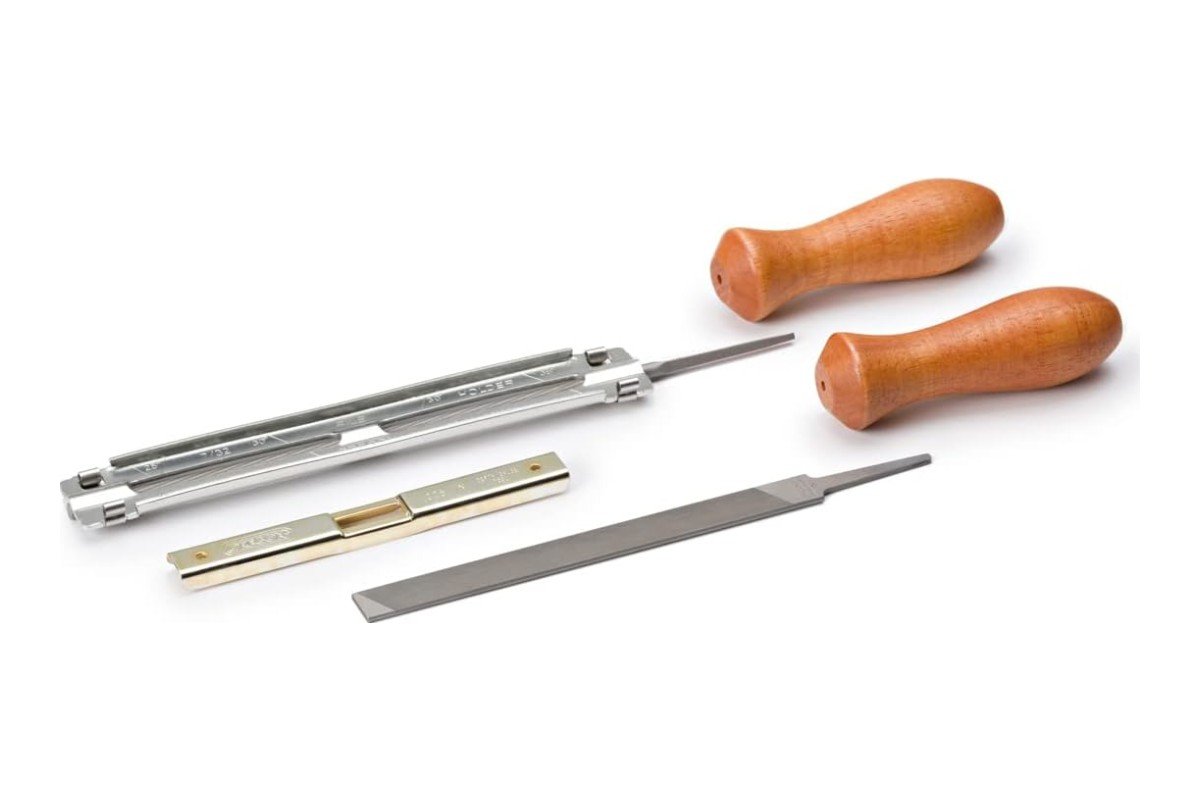
Table of Contents
Why chainsaw mill chains dull faster than felling or bucking chains
Milling asks more of a chain per session than almost any other chainsaw task. A single slab cut through a 24-inch log can run the chain through several feet of continuous cutting without a break, compared to the short bursts of a felling cut or the handful of seconds it takes to buck a round into firewood lengths. More linear feet of contact means more heat, more friction, and more cumulative wear on the cutting edge before you ever stop to check it.
Milled logs also carry more of what dulls a chain: bark-embedded grit, dirt picked up when the log was rolled across the ground, and mineral deposits that build up inside the bark of trees that grew near roads or fence lines. A single pass through a log with embedded gravel or an old fence staple can take a cutter from sharp to useless in one cut, regardless of how good the chain was to start.
Heat dulls chains fastest in milling
Standard bucking and felling cuts clear chips fast and let the chain cool between passes. A long mill cut does neither. The chain stays engaged in the kerf (the slot a blade or chain cuts) longer, chip clearance slows because the chain cuts with the grain instead of across it, and heat has more time to build in the cutter and rivets. Chains run hot for extended periods and lose temper faster, which means the edge dulls sooner even before you account for the grit and sap in the wood itself. Keeping the oiler working and the chain properly tensioned (loose enough to move freely, tight enough not to flop) does more to fight this heat buildup than any sharpening technique.
The correct sharpening angle: ripping chain versus standard chain
Getting the angle right matters more in milling than in any other chainsaw application, because a ripping chain and a standard chain are filed to different geometries, and mixing them up defeats the entire purpose of running ripping chain in the first place.
Ripping chain: roughly a 10-degree top plate angle
A ripping chain's cutters are filed at about 10 degrees off the bar, compared to the 25 to 35 degrees used on a standard crosscut chain. That shallow angle is what lets the chain slice with the wood grain instead of tearing across it, producing the smoother, flatter cut a mill needs. If you resharpen a ripping chain at a standard 30-degree angle out of habit, you have effectively converted it back into a crosscut chain, and it will cut roughly and slowly again even though it is technically still a "ripping chain" by name.
Standard chain: 25 to 35 degrees, and why it still shows up on some mills
Not everyone mills with a dedicated ripping chain, and there is nothing wrong with running a standard chain through a chainsaw mill occasionally, especially on a budget mill or for an occasional cut. Just know the tradeoff going in: a standard-ground chain will produce a rougher surface and cut noticeably slower through a rip cut, and it needs sharpening more often under milling conditions because the cutting geometry is working against the grain the whole time. If you are sharpening a standard chain that occasionally sees mill duty, keep it at its normal 25 to 35 degree angle rather than trying to split the difference.
A filing gauge or jig removes the guesswork
Filing angle drifts a degree or two at a time without you noticing, especially by hand. A filing guide that clips onto the chain and holds the file at a fixed angle (most ripping-chain-specific guides are set to 10 degrees, most general-purpose guides to 30) removes almost all of that drift. It is worth adding to your kit even if you already know the angle by feel.
Tools for sharpening a chainsaw mill chain
There are three practical ways to keep a mill chain sharp, and which one makes sense depends mostly on how often you mill and how many chains you are cycling through.
Round file and filing guide (manual)
A round file sized to your chain's pitch, paired with a filing guide, is the cheapest and most portable option, and it is all you need if you are milling occasionally. The file diameter has to match the chain pitch (typically 5/32-inch for 3/8-inch low-profile chain, 7/32-inch for full-size 3/8-inch chain, 3/16-inch for .325-inch chain, and 5/32-inch for 1/4-inch chain), so check your chain's stamped size before buying a file. The tradeoff is time and consistency: hand filing every cutter to a matching length and angle takes practice, and an inconsistent hand will leave some teeth cutting more than others, which shows up as a chain that pulls to one side mid-cut.
- Cheapest and most portable sharpening option
- All you need if you are milling occasionally
- File diameter matched to chain pitch keeps the setup simple once you know your chain's size
- Takes practice to file every cutter to a matching length and angle
- An inconsistent hand leaves some teeth cutting more than others, causing the chain to pull to one side
Bar-mounted electric grinder
A bar-mounted grinder (sometimes called a chain grinder or bench grinder for chains) clamps onto a workbench and uses a spinning abrasive wheel set to a fixed angle, giving every cutter an identical grind in a fraction of the time hand filing takes. This is the right tool if you run a mill regularly, cycle through multiple chains in a session, or sharpen chains for other people. The downside is cost (a decent bench grinder for chains is a real investment) and the learning curve of avoiding cutter-edge overheating, since an aggressive grinder pass can burn the temper out of a cutter just as easily as a long hot cut can.
- Spinning abrasive wheel gives every cutter an identical grind in a fraction of hand-filing time
- Right tool for anyone running a mill regularly or sharpening chains for other people
- Removes the inconsistency risk that comes with hand filing
- A decent bench grinder for chains is a real cost investment
- Learning curve around avoiding cutter-edge overheating, since an aggressive pass can burn the temper out of a cutter
Chain sharpening jig systems (Granberg-style)
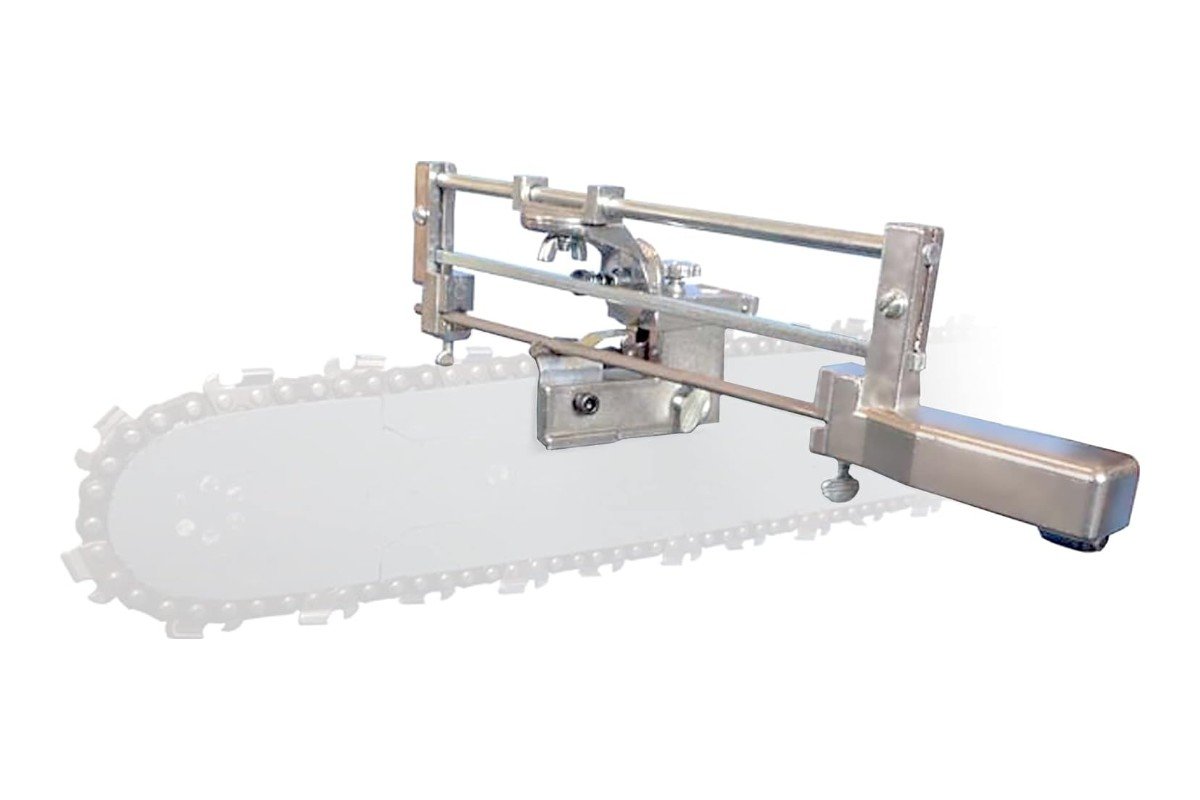
A sharpening jig, like Granberg's own bar-mounted filing jig, sits between the fully manual file-and-guide approach and a bench grinder. It clamps onto the bar itself and guides a standard round file at a locked-in angle and depth, giving you most of a grinder's consistency without the cost or the risk of burning the edge. These are a natural fit for chainsaw mill owners specifically, since you are already carrying the mill's bar clamps and rails to the job site, and the jig travels with the same kit.
- Clamps onto the bar and locks in angle and depth, giving most of a grinder's consistency without the grinder's cost
- Lower risk of burning the edge compared to a bench grinder
- Natural fit for chainsaw mill owners already carrying bar clamps and rails, since the jig travels with the same kit
- Still uses a round file and manual filing motion, just guided rather than eliminated
- Not as fast as a powered bench grinder for someone cycling through many chains
Common sharpening mistakes that shorten chain life
Most sharpening problems on a mill chain trace back to one of a handful of habits, and they are worth checking against even if you have been filing chains for years.
Filing at the wrong angle out of habit
This is the single most common mistake specific to milling: filing a ripping chain at the same 30-degree angle you would use on a felling chain, simply because that is the angle your hands know. Over two or three sharpenings, this quietly converts a ripping chain back into something closer to a standard crosscut grind, and the mill starts cutting rough and slow again for no obvious reason. Label your ripping-chain filing guide if you use both types, or keep them in physically separate cases so you never grab the wrong one without thinking.
Uneven stroke count from side to side
Filing one side of the chain with three strokes per cutter and the other with five, even without noticing, leaves one side cutting more aggressively than the other. The chain then pulls toward whichever side has the longer, sharper teeth, which shows up as a cut that curves instead of running straight through the log. Counting strokes out loud, or using a filing guide with a stroke-counter feature, fixes this faster than trying to "feel" for consistency.
Ignoring the depth gauges entirely
It is easy to file cutters for years and never touch the depth gauges, especially with a bar-mounted grinder that only touches the cutting edge. As the cutters get shorter from repeated sharpening, the depth gauges become relatively taller compared to the new, shorter cutter, which limits how deep each tooth can bite into the wood. The saw starts feeling underpowered even though the engine and chain are both fine. It is simply being prevented from taking a full bite. Checking depth gauge height every third sharpening avoids this slow decline entirely.
Overheating the edge with an aggressive grinder pass
A bench grinder removes material fast, and you can grind hard enough, for long enough, that the cutter's edge turns visible blue or gray from heat. That discoloration means the temper has been drawn out of the steel at the edge, and the cutter will dull again almost immediately no matter how sharp it looks right after grinding. Light, repeated passes with pauses to let the metal cool beat one long, hard pass every time.
Sharpening on the job site versus at home
Where you sharpen changes which tool makes sense. A round file and filing guide fit in a shirt pocket and need nothing but the chain already on the bar, making them the only realistic option for a mid-day touch-up in the field, away from an outlet or a workbench. A bar-mounted grinder is a home or shop tool: it needs a stable mounting surface and, in most cases, household power, so it suits sharpening a batch of chains before a milling trip better than fixing one mid-session.
A practical approach many mill owners settle into is carrying a file and guide for quick field touch-ups between cuts, then doing a fuller sharpening pass on a grinder or jig at home once the chain has been through several logs. That combination lets you cut a full day in the field without packing a grinder, while still getting more consistent sharpening at the end of the trip.
How to sharpen a chainsaw mill chain by hand: step by step
- Clean the chain first. Wipe or brush off bar oil, sawdust, and sap before you start. Filing through a caked chain wastes strokes and makes it harder to see the cutter's actual condition.
- Tension the chain on the bar. A loose chain flexes away from the file instead of staying still. Tighten it to normal running tension before you begin.
- Match the file to the chain pitch and clip on the filing guide at the correct angle (10 degrees for ripping chain, 25 to 35 for standard chain).
- Pick a starting cutter and mark it with a paint pen or piece of tape so you know when you have worked all the way around the loop.
- File each cutter with 2 to 4 forward strokes, lifting the file on the return stroke rather than dragging it backward. Keep the stroke count consistent from cutter to cutter, since this keeps every tooth the same length.
- Work all the way around the chain, then flip your position (or rotate the bar) to file the cutters on the opposite side, since most filing guides only reach one side of the chain from a given position.
- Check the depth gauges (rakers) every third sharpening or so. As cutters get filed shorter, the depth gauges need to come down slightly too, or they will start preventing the cutter from biting into the wood. A depth gauge tool and a flat file handle this in a couple of minutes.
- Wipe the chain down and re-oil it before putting the saw back to work.
When to replace the chain instead of sharpening it
Sharpening has limits, and running a chain past them wastes time and risks a mid-cut break. Replace rather than resharpen when you see any of the following. Look for cutters worn down to the depth gauge's height or below (no more cutting edge left to file), visible cracks in a drive link or tie strap, a rivet that has worked loose enough to let the chain flex sideways, or a chain that has been shortened by repeated sharpening to the point that it no longer fits your bar's effective length. As a rough rule of thumb, most chains tolerate somewhere around 8 to 12 hand sharpenings before they are worn down too far to be worth the time. Heavy milling use with a grinder that removes more material per pass will shorten that count.
Bar and oiler maintenance while you are at it
A perfectly sharp chain on a neglected bar will still cut poorly, so a real maintenance routine covers the bar and oiler, not just the cutters.
- Clean the bar groove with a groove cleaning tool or a flathead screwdriver every few sharpenings. Sawdust packs into the groove and restricts oil flow to the tip, which accelerates bar and chain wear together.
- Check the oiler port on the bar and the saw body for blockages. A mill cut relies more heavily on steady bar oil than a felling cut does, since the chain spends so much longer engaged in the kerf.
- Flip the bar periodically, if your saw and bar allow it, so groove-rail wear is even on both sides rather than concentrated on the side that always faces down.
- Check mill rail alignment against the bar each time you remount the mill, since a bar with uneven groove wear can throw off the cut even with a perfectly sharp chain.
- Inspect drive sprocket wear when you replace a chain. A worn sprocket will wear out a brand-new chain fast, so replace the sprocket at the same time if it shows rounded or hooked teeth.
Our chainsaw mill accessories guide covers oiler kits and guide bars in more depth if the bar itself needs replacing rather than just cleaning.
Sharpening cost versus chain replacement cost over a season
A round file costs a few dollars and lasts for several sharpenings before it dulls and needs replacing, so hand sharpening a chain a dozen times over a season typically costs less than the price of one replacement chain in files alone. A bar-mounted grinder or jig costs more upfront, but spreads that cost across every chain you own and every season you keep milling, which is why it tends to pay for itself faster for anyone running more than one or two chains regularly. Either way, the real cost comparison is time. A chain that stays sharp cuts faster and with less strain on the saw's engine and clutch. That adds up over a season of milling more than the price difference between a file and a grinder ever will.
A simple maintenance routine that gets followed
The maintenance schedule that works in practice is the one simple enough to stick to. Something like this covers the real risk points without turning every milling session into a teardown:
| When | What to check |
|---|---|
| Every tank of fuel or battery charge | Chain tension, bar oil level, visible cutter damage |
| Every log or every few cuts | Cutter sharpness (does it still pull itself into the wood, or does it need pressure to cut) |
| Every sharpening | Depth gauge height, chain cleanliness before filing |
| Every 3rd sharpening | Bar groove cleaning, oiler port check |
| Chain replacement | Drive sprocket wear, bar wear on both rails |
Our picks: sharpening tools worth buying
These are real, currently listed products chosen based on published specs and pricing rather than hands-on testing we performed ourselves. Confirm current pricing before buying, since listings and prices change.
| Product | Type | Best for |
|---|---|---|
| Oregon file and guide combo kit | Round file + filing guide | Occasional millers who want a low-cost, portable setup |
| Granberg Bar-Mount Chain Saw Sharpener | Bar-mounted filing jig | Mill owners who want grinder-like consistency without a bench grinder |
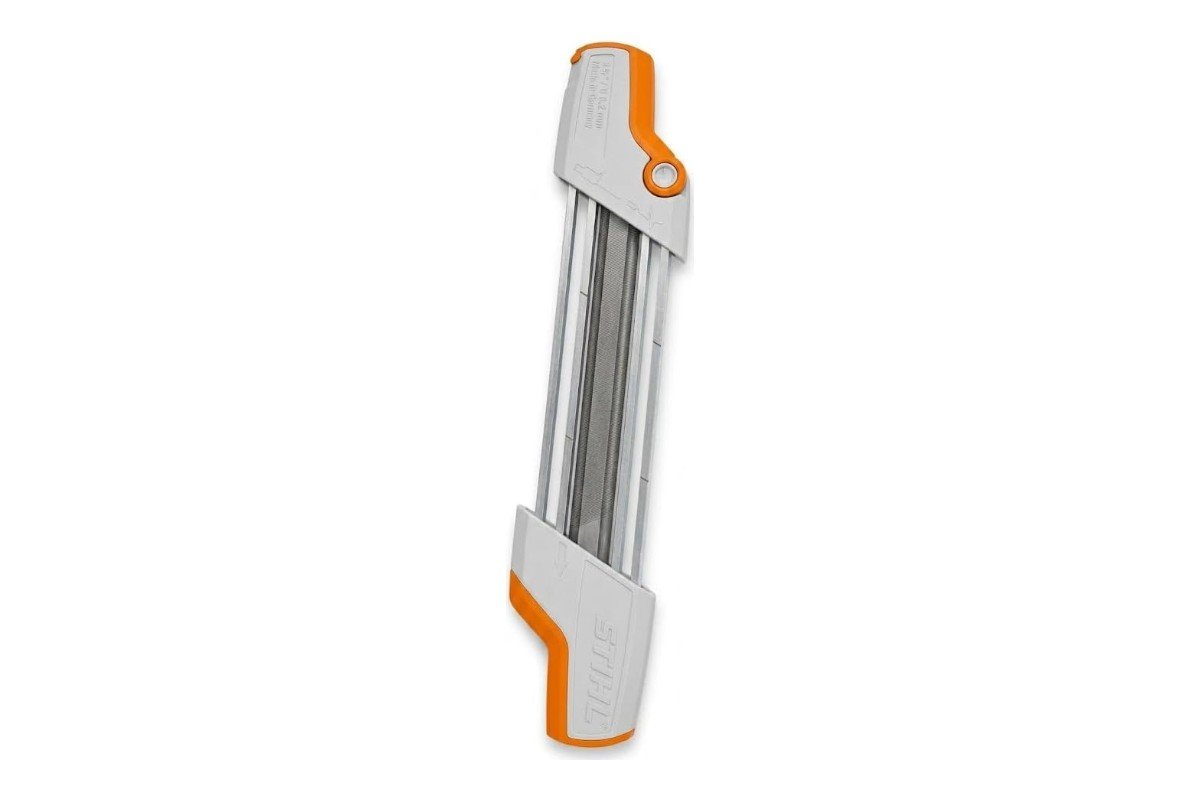
| Stihl 2-in-1 Easy File | Combination top-plate and depth-gauge filing guide | Filing cutters and rakers in the same pass, less setup |
| Timberline Chainsaw Sharpener | Handheld carbide sharpening tool | Fast touch-ups between full sharpenings |
Check current listings on Amazon for exact pricing: chainsaw chain sharpening kits.
Quick answers
Should I sharpen my ripping chain the same way as a regular chain?
No. Ripping chain is filed to roughly a 10-degree angle, while standard chain runs 25 to 35 degrees. Use a filing guide matched to whichever chain you have, since eyeballing the difference is hard to do consistently by hand.
How often should I sharpen a chainsaw mill chain?
Check it every log and touch it up as soon as you notice the saw needing more downward pressure to cut, rather than waiting for a fixed interval. Milling dulls a chain faster than felling or bucking, so every tank of fuel is a reasonable rough default if you are not sure yet.
Can I use a bench grinder meant for regular chains on a ripping chain?
Only if you can set it to the ripping chain's shallower angle. Most bench grinders are adjustable, so check the angle setting before running a ripping chain through one set up for standard chain, or you will grind it back into a crosscut profile.
What file size do I need for my chain?
Match the file diameter to your chain's pitch: 5/32-inch for 3/8-inch low-profile chain, 7/32-inch for full-size 3/8-inch chain, 3/16-inch for .325-inch chain (or 11/64-inch on some Stihl-specific chains), and 5/32-inch for 1/4-inch chain. The pitch is stamped on the chain's drive links or listed on the packaging.
Why does my chain cut crooked even after sharpening?
Uneven cutter length is the most common cause. If one side of the chain has slightly shorter cutters than the other, from inconsistent hand filing or a chain that was already asymmetric before you started, the chain will pull toward the side with the longer teeth. A bar-mounted jig or grinder largely fixes this by automatically grinding every cutter to the same length.
Do I need to sharpen the depth gauges too, or just the cutters?
Yes, periodically. As cutters wear down from repeated sharpening, the depth gauges (rakers) end up relatively taller, which reduces how deep the cutter can bite and slows the cut. Check and file the depth gauges every third sharpening or so with a depth gauge tool.