
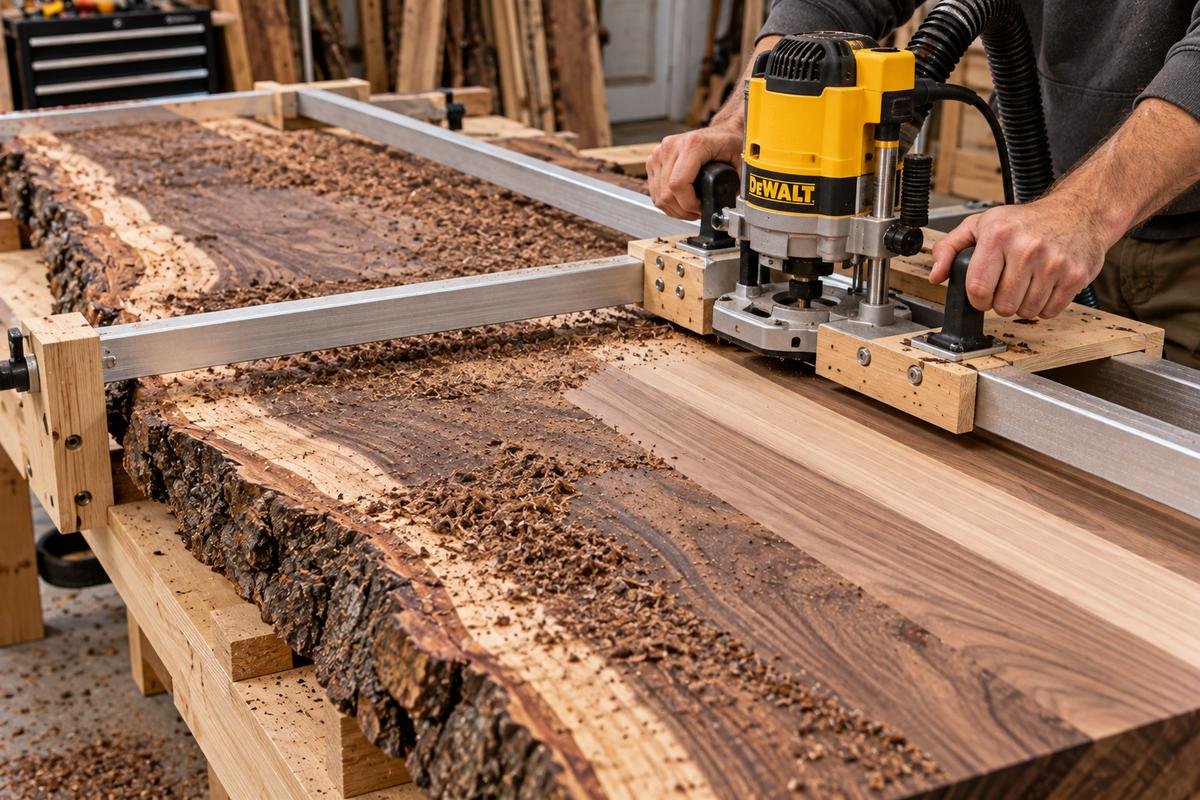
If you just milled a slab with a chainsaw mill or a portable sawmill, it is not flat, no matter how careful the cut was. Chain deflection, bar flex, and the wood's own internal stress all pull a freshly cut slab slightly out of true, and drying pulls it further out of true after that.
Learning how to flatten a wood slab after milling comes down to three choices. You can build or buy a router sled and do it yourself, pay a shop to run it through a planer or wide belt sander, or send it to a CNC shop (one with computer-controlled cutting machines). Which one makes sense depends mostly on the slab's size and how many you have.
Whether you already own a chainsaw mill rail system you can repurpose matters too.
Table of Contents
- Why a Freshly Milled Slab Is Not Flat Yet
- Dry the Slab Before You Do the Final Flatten
- How to Flatten a Wood Slab: Your Three Real Options
- Option 1: Flatten It Yourself With a Router Sled
- Option 2: Pay a Shop to Run It Through a Planer or Wide Belt Sander
- Option 3: CNC Flattening
- Cost and Time, by Slab Size
- Step by Step: How to Flatten a Wood Slab With a Router Sled
- Common Mistakes That Ruin a Slab Mid-Flatten
- Safety
- Frequently Asked Questions
- Related Guides
Why a Freshly Milled Slab Is Not Flat Yet
A log under tension releases that tension the moment you cut into it. Some of that movement happens the instant the slab comes off the mill. More of it happens over the following weeks as the wood dries and the cell structure shrinks unevenly across the grain. The result shows up as one of three classic problems: cup (the two long edges curl up or down relative to the center), bow (a curve along the length), or twist (the four corners do not sit in the same plane). A slab can have all three at once.
None of this means the milling was done wrong. It is just what wood does. The flattening step exists specifically to correct it, which is why it is treated as a separate job from milling, not a quick touch-up.
Dry the Slab Before You Do the Final Flatten
This is the step most guides on how to flatten a wood slab skip, because most of them are written for woodworkers buying a slab that is already kiln-dried. If you milled your own, the slab is wet, and wet wood keeps moving as it loses moisture. Flatten it too early, and it will cup or twist right back out of true before you ever get to build with it.
Get the slab to somewhere close to its final moisture content (how much water is in the wood, as a percent of its dry weight) first. If you are air drying (letting lumber dry slowly outdoors in a stacked pile), our guide to air drying lumber after milling walks through stacking and sticker spacing and gives a rough timeline by thickness. If you want to speed that up, our DIY lumber kiln guide covers building a solar or dehumidification kiln, which can cut the wait from months to weeks. A rough pass right after milling, just to knock down the worst high spots so the slab stacks flat while it dries, is fine and often worth doing. Save the real, final flattening pass for after it has dried.
How to Flatten a Wood Slab: Your Three Real Options
Once the slab is dry, here is how to flatten a wood slab using one of three practical paths. A router sled is the only option that costs nothing beyond the tool itself and works on a slab of any size, including an 8-foot tabletop blank. A planer or wide belt sander at a local shop is usually the fastest and cheapest option per slab, but shop equipment tops out around 20 to 25 inches of width, sometimes more for a wide belt sander.
A CNC shop costs the most and isn't fast, but it is the right call for a slab with embedded resin, an odd shape, or a finished piece you don't want to risk on a first attempt with a hand router.
Option 1: Flatten It Yourself With a Router Sled
How a Router Sled Works
This is the core tool for how to flatten a wood slab yourself. A router sled is two straight, level rails set on either side of the slab, with a carriage that rides across them carrying a router fitted with a wide, flat-bottomed bit. You run the router back and forth across the slab in overlapping passes, lowering it slightly between passes, until the bit has touched every point on the surface. The rails do the work of staying flat. The router just has to ride along them.
Build One From the Mill Rails You Already Own
If you own a Granberg-style chainsaw mill rail system, you already have the hardest part of a router sled sitting in your garage. The same straight rails that guided your chainsaw across the log can carry a router carriage instead of a mill.
Set the rails on sawhorses or blocking at each end of the slab, level them to each other with a long straightedge and a level, the same way you would level the mill rails before a cut. Then build a simple plywood crosspiece that rides on top of both rails with your router clamped or bolted to its center. Two long, straight 2x4s or a length of extruded aluminum work as the crosspiece's own rails if your mill rails are spaced wider than the slab.
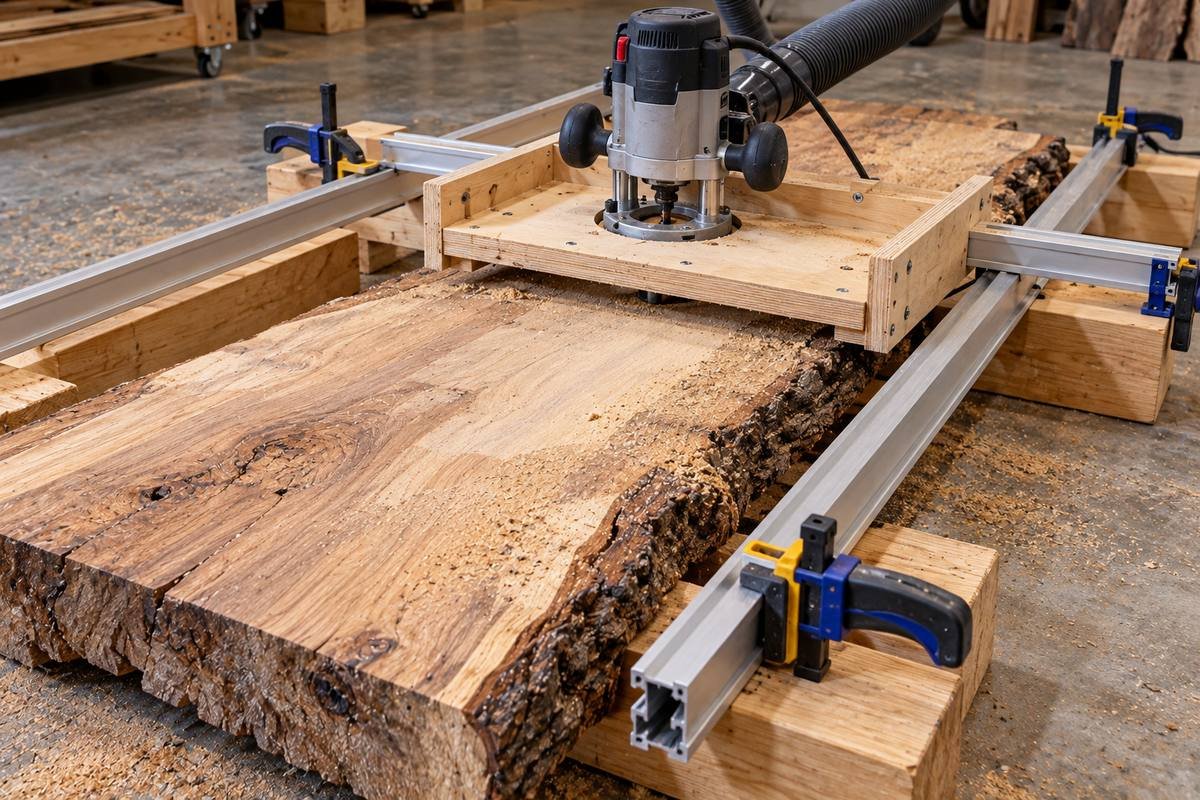
This will not be as rigid as a dedicated, pre-machined sled, and it takes an hour or two to set up correctly, but it lets you flatten a wood slab without buying new tools. For a one-off slab, it costs almost nothing, and it uses equipment most chainsaw mill owners already have sitting around between projects.
Or Buy a Dedicated Sled
For repeated use, a purpose-built sled is faster to set up and holds its adjustment better than a shop-built one. These three cover the range from a tight budget to a heavier, longer-capacity build.
Budget pick: acrylic-base adjustable router sled
A lightweight 48 to 58 inch sled with an acrylic router baseplate and plastic sliding tracks, built to fit most trim and compact routers. It is the easiest way to try slab flattening on a cutting-board-size or small slab before committing to a heavier rig.
Mid-range pick: 48-inch steel and aluminum L-carriage sled
A heavier 48-inch kit built from steel rails with aluminum L-carriages and a height-adjustable block system, rated 4.4 out of 5 across 87 verified ratings on Amazon. Owners consistently note the 20mm steel rods do not flex even at full width, and several have extended the rail length with their own straight stock to flatten slabs well past the stated 48 inches.
Longest capacity pick: 64-inch X and Y axis adjustable sled
A 64-inch sled rated 4.2 out of 5 across 63 ratings, currently an Amazon's Choice pick in this category with over 100 bought in the past month. The extra length makes it the practical choice for a full tabletop or bench slab without extending the rails yourself.
The One Bit That Matters
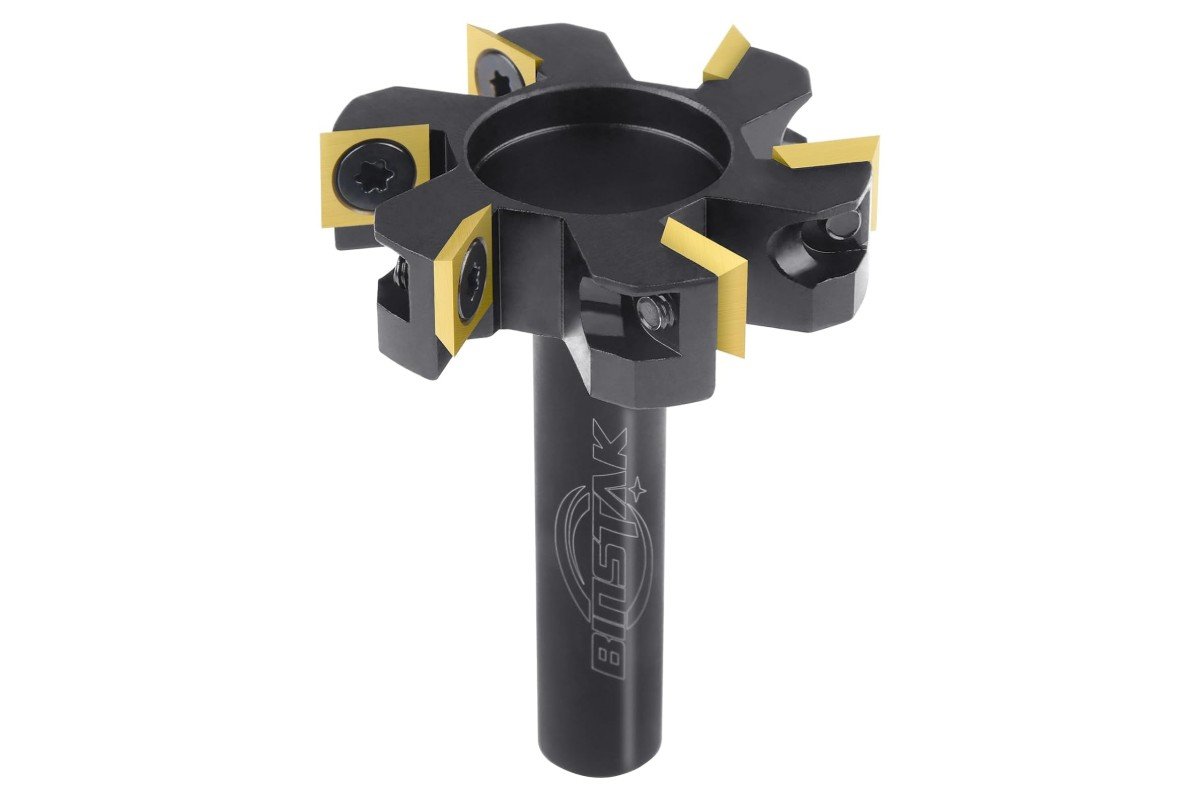
The sled gets all the attention, but the bit does the cutting. A slab flattening job needs a wide, flat-bottomed surfacing bit, not a standard straight bit, or you will leave visible overlap lines across the whole surface. A 2-inch cutting diameter with carbide inserts is the common choice: wide enough to clear material quickly, small enough to run safely in a mid-size router.
The bit: 2-inch carbide-insert spoilboard surfacing bit
A half-inch shank, 2 inch cutting diameter surfacing bit with replaceable carbide inserts, rated 4.5 out of 5 across more than 2,000 ratings. This is the bit that does the flattening, whether it is mounted in a store-bought sled or the DIY mill-rail version above, and the replaceable inserts mean you are not buying a whole new bit once the edge dulls.
Option 2: Pay a Shop to Run It Through a Planer or Wide Belt Sander
Most towns with a cabinet shop, millwork shop, or woodworking cooperative have a planer or wide belt sander that can take a slab through in a few passes. Call ahead and ask about their width limit before you load up the truck. A standard 20-inch planer will not take a 30-inch slab, but a wide belt sander at a cabinet shop often will, and it leaves a sanded finish instead of planer marks.
It is also worth just asking whoever you bought or milled the log near, since sawmills and lumberyards sometimes run their own flattening equipment on request and may charge less than a dedicated woodworking shop. This is an easy step to skip, and it is often the cheapest option on the list for a single slab if the width fits their machine.
Option 3: CNC Flattening
A CNC router is another way to handle how to flatten a wood slab: it uses a wide surfacing bit the same way a hand-guided sled does, but with a computer controlling the path instead of your arms. It makes sense for a slab with embedded river-table resin you cannot risk gouging, an oddly shaped live edge (the natural outer edge of the log, left in place) piece that will not sit still on a sled. It also suits a batch of several slabs where consistency matters more than cost.
It is not fast. Expect shop rates near what a specialty CNC job normally runs, billed by the hour, and a slab still has to be set up, measured, and probed before the machine makes a cut. For a single rustic slab headed for a workbench or a shelf, this is usually more than you need.
Cost and Time, by Slab Size
Here is how the cost and time to flatten a wood slab compare once you factor in size, since that variable determines which option is realistic.
| Slab size | DIY router sled | Local planer or wide belt shop | CNC shop |
|---|---|---|---|
| Small, under 24 inches wide | Budget sled pays for itself after one slab | Usually the fastest option if it fits their machine | Rarely worth the hourly rate for a small piece |
| Medium, 24 to 40 inches wide | Mid-range sled is the better fit here | Needs a wide belt sander, and not every shop has one this size | Worth it only for resin or an odd shape |
| Large, tabletop size or bigger | Long-capacity sled or an extended mill-rail build | Most shop equipment will not fit it at all | Often the only shop option left besides a sled |
Step by Step: How to Flatten a Wood Slab With a Router Sled
This is the same sequence for how to flatten a wood slab whether you are running a store-bought sled or one built from your own mill rails.
- Confirm the slab is dry, or at least close to its target moisture content. Flattening wet wood wastes the whole effort once it moves again.
- Set up your rails, whether that is a store-bought sled or your own mill rails, and check them level and parallel to each other with a long straightedge before you touch the router to the wood.
- Shim under the slab itself so it cannot rock. A slab that rocks mid-pass will cut unevenly no matter how level your rails are.
- Make a rough first pass with a wide stepover across the whole surface, just to find the true high and low points. Do not try to finish the surface on this pass.
- Lower the bit slightly and make a second, overlapping pass. Repeat until the bit is touching every point on the surface with no gaps.
- Check with a straightedge laid across the slab in several directions. Any light showing underneath means the bit hasn't reached a low spot.
- Flip the slab and repeat the process on the second face once you confirm the first face is flat.
- Finish sanding to remove the mill marks the router bit leaves behind, then reseal any end grain that is now freshly exposed.
Common Mistakes That Ruin a Slab Mid-Flatten
Knowing how to flatten a wood slab well also means avoiding a few mistakes that show up again and again on forum threads and in the reviews of the sleds above.
- Flattening before the slab has dried, which undoes the work as the wood keeps moving.
- Skipping the shims under the slab, so it rocks slightly during the pass and the bit cuts through a low spot instead of riding flat.
- Taking too aggressive a stepover between passes, which leaves ridges that then need a heavy, time-consuming sanding pass to remove.
- Running the router against the grain instead of with it, which causes tearout especially on figured or spalted wood.
- Working without real dust collection or a rated respirator through an hours-long flattening session, not just a quick cut.
Safety
Learning how to flatten a wood slab also means handling the job safely. A slab flattening job throws a lot of fine dust and runs a router at full speed for an extended stretch, longer than most normal routing jobs. OSHA's logging safety guidance (OSHA is the federal workplace safety agency) applies here the same way it applies to milling itself: wear a respirator rated for wood dust, not just a basic dust mask, along with eye and hearing protection.
Clamp or wedge the slab so it cannot shift or rock mid-pass, since a moving workpiece under a spinning bit is how routers kick back. A wide surfacing bit also needs a slower speed (RPM) than a small straight bit, so check your router's manual against the bit's rated speed before the first pass.
Frequently Asked Questions
A few quick answers on how to flatten a wood slab before you start.
How do I flatten a wood slab without a planer?
A router sled is the standard way to flatten a slab too wide for a planer. It uses a router riding on two level rails to skim the surface in overlapping passes, and it works on slabs of almost any size since the rails simply extend to match.
What size router bit do I need for a slab flattening sled?
A wide, flat-bottomed surfacing bit around 2 inches in cutting diameter is the common choice. A standard straight bit is too narrow and will leave visible ridges across the surface.
Can I use my chainsaw mill rails as a router sled?
Yes. The same straight, level rail system used to guide a chainsaw mill can carry a router carriage instead, using the same leveling process you already use before a milling cut.
How much does it cost to have a slab flattened professionally?
It depends on the slab's width and the shop. A local planer or wide belt sander pass is usually the cheapest professional option if the slab fits the machine. CNC flattening runs closer to a specialty hourly shop rate and is reserved for resin work or oddly shaped pieces.
Do I need to flatten both sides of a slab?
For most projects, yes. Flatten the first face completely, then flip the slab and flatten the second face to match, which is also when you bring the slab down to its final thickness.
How long does it take to flatten a slab with a router sled?
A single slab typically takes one to a few hours once the rails are set up, depending on its size and how far out of true it started. Rail setup and leveling is usually the slower part, not the routing itself.